")
")


The Ultimate Guide to Setting Up Your Synology NAS
- Mahmoud Hanafy
- Category: Synology FAQ
- Hits: 287
Chapter 1: Before You Start
Notes : All images below are for illustrative purposes only, and may differ from the actual product.

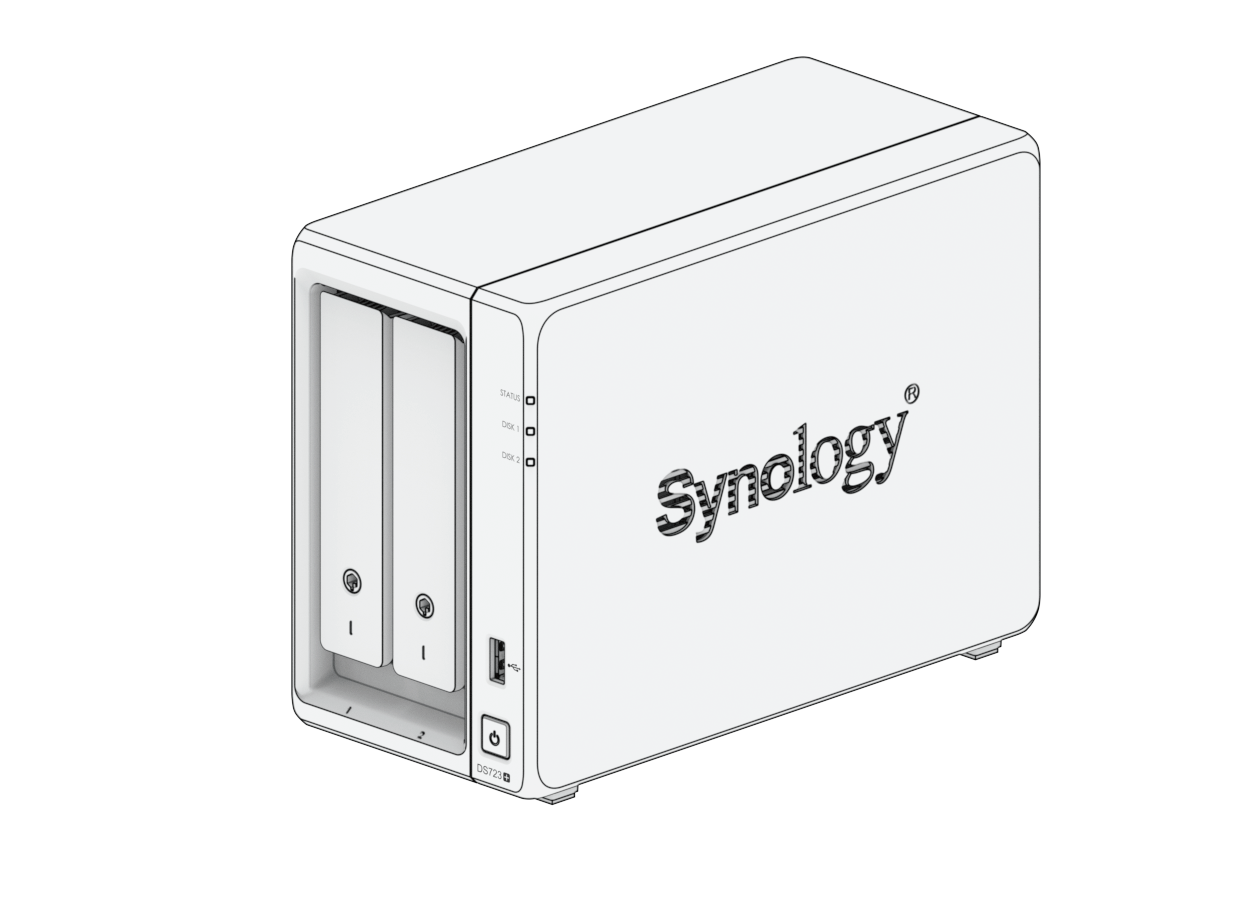
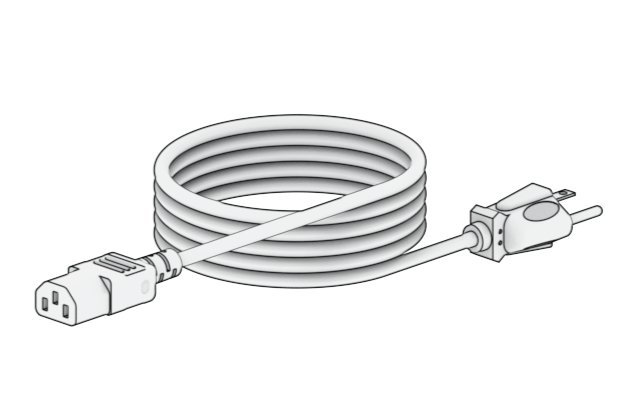
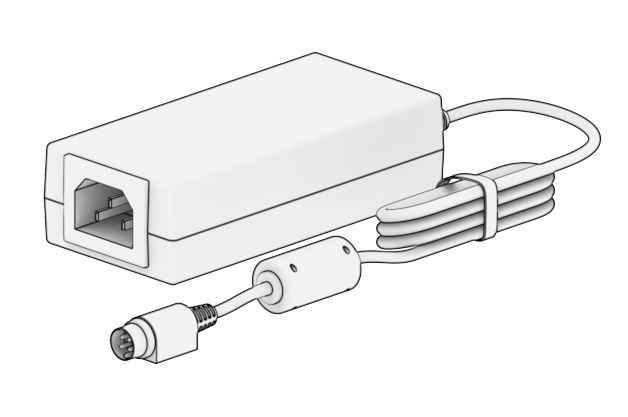
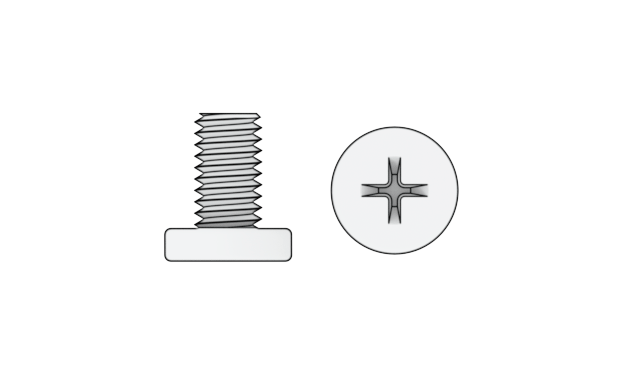
1.1 Package contents
|
Main unit x 1
|
AC power cord x 1
|
 |
 |
|
|
|
|
AC power adapter x 1
|
RJ-45 LAN cable x 2
|
 |
 |
|
|
|
|
Screws for 2.5" drives x 10
|
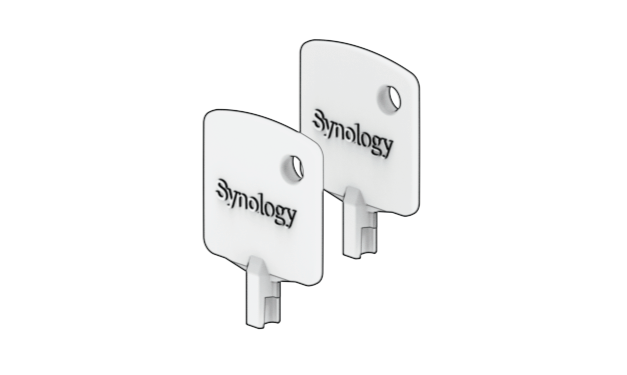
Hard drive tray key x 2
|
 |
 |
Chapter 2: Hardware Setup

2.1 Tools and Parts for Component Installation
Please prepare the tools and parts below before setting up your Synology NAS:
A screwdriver (only for 2.5" drives)
At least one 3.5" or 2.5" SATA drive (see here for compatible drive models)
Caution : If you install a drive that contains data, the system will format the drive and erase all existing data. Please back up any important data before installation.

2.2 Install drives
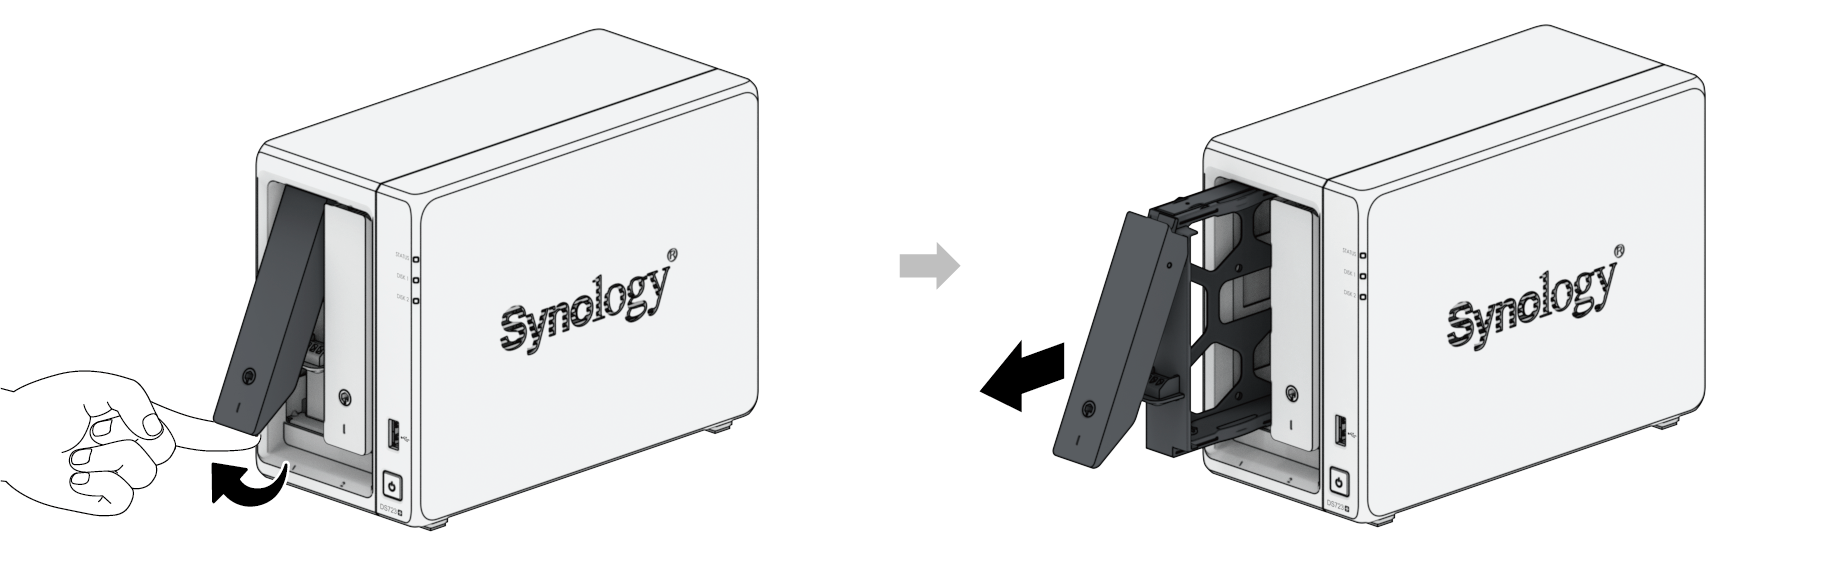
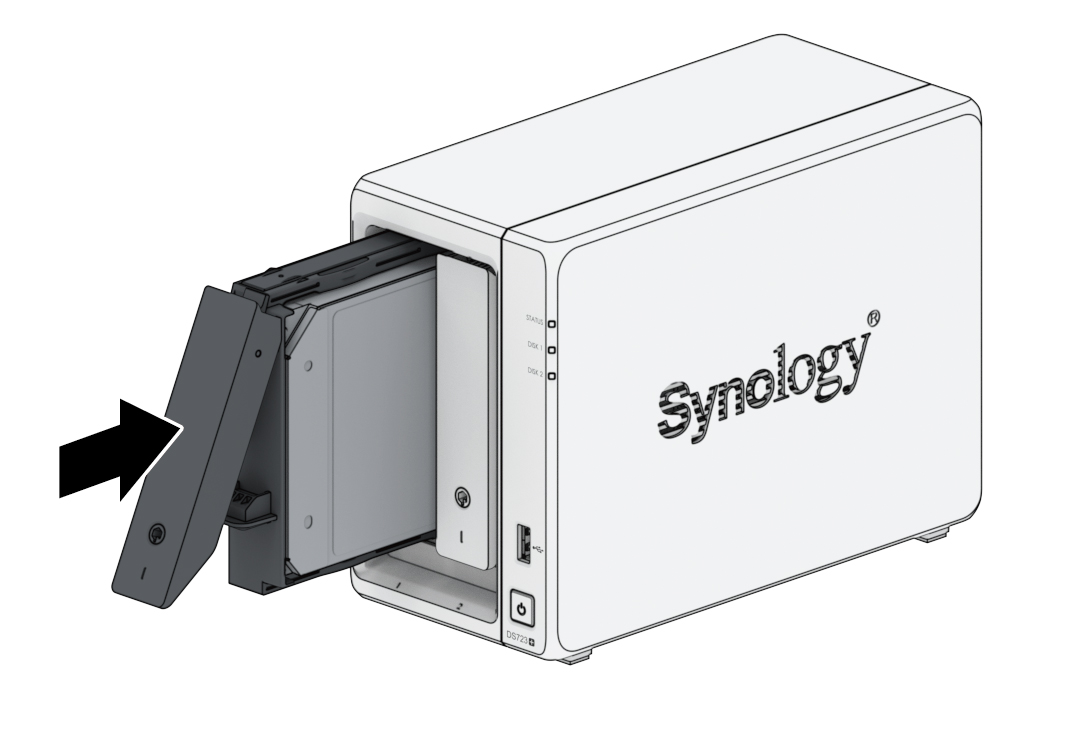
1. To remove the drive tray, pull in the indicated direction as shown in the image below.
2. Load drives in the drive trays.
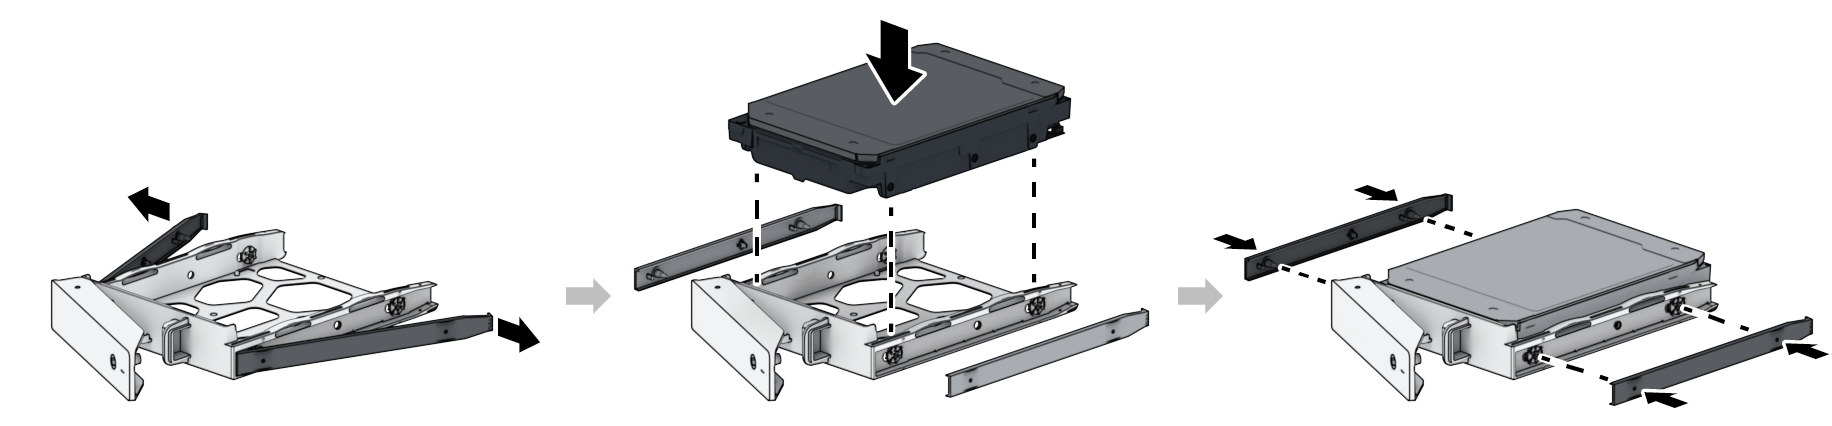
3. For 3.5" drives: Remove the fastening panels from the sides of the drive tray. Place the drive in the drive tray. Then insert the fastening panels to secure the drive in place.
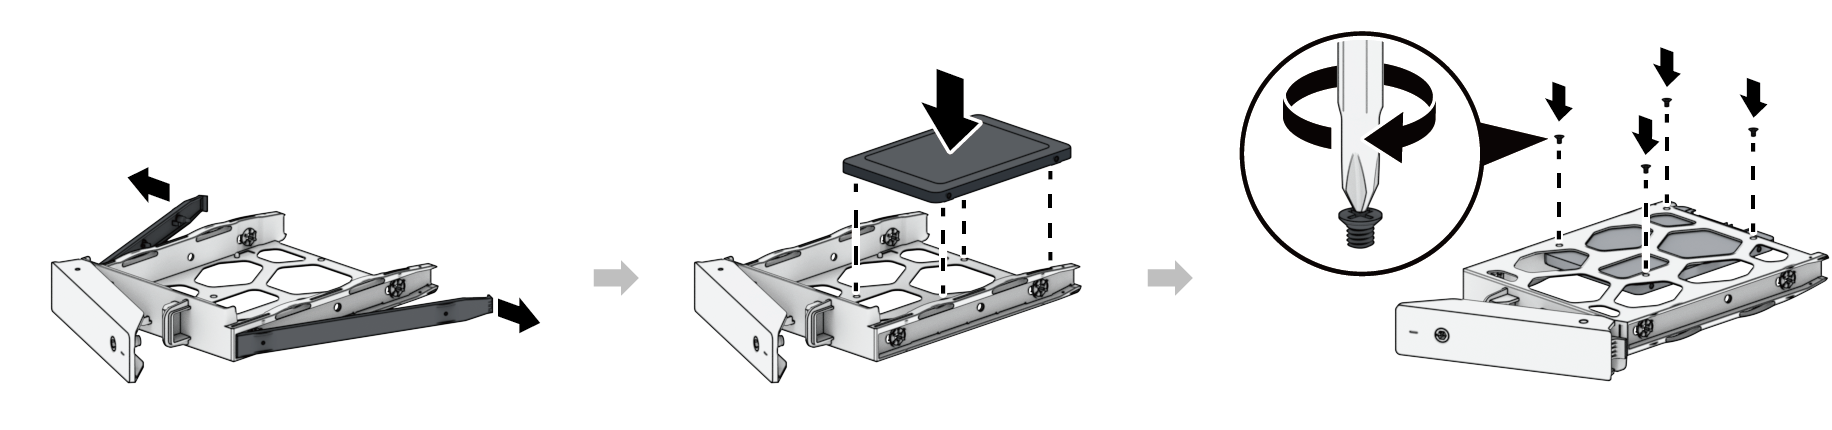
4. For 2.5" drives: Remove the fastening panels from the sides of the drive tray and store them in a safe place. Place the drive in the area of the drive tray indicated below, turn the tray upside down, and then tighten the screws provided to secure the drive in place.
5. Insert the loaded drive tray into the empty drive bay and push it back until you hear a click when the tray is locked into place.
Notes : Make sure the tray is completely inserted. Otherwise, the drive might not function properly.
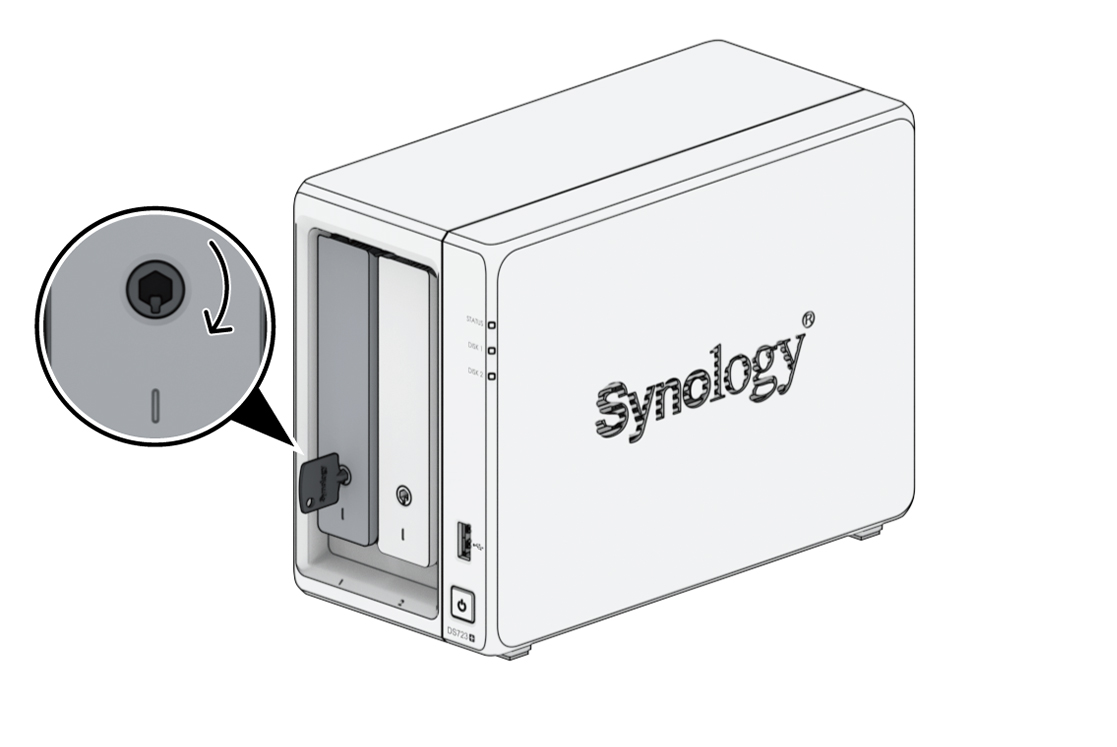
6. Insert the hard drive tray key into the hard drive tray lock, turn the key clockwise (to the "I" position) to lock the hard drive tray handle, and then remove the key.
7. Repeat the steps above to install the other drives you have prepared.
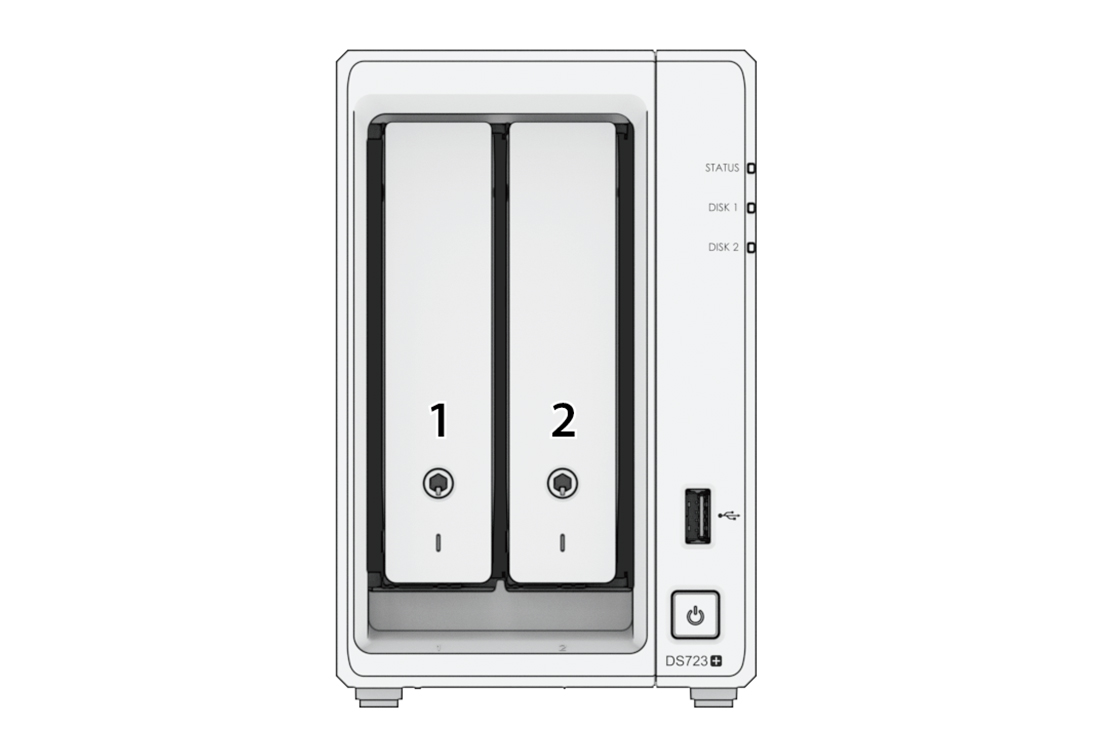
8. Drives are numbered as shown below.
Notes : If you plan to create a RAID volume, we recommend installing drives of identical size to make the best use of drive capacity.
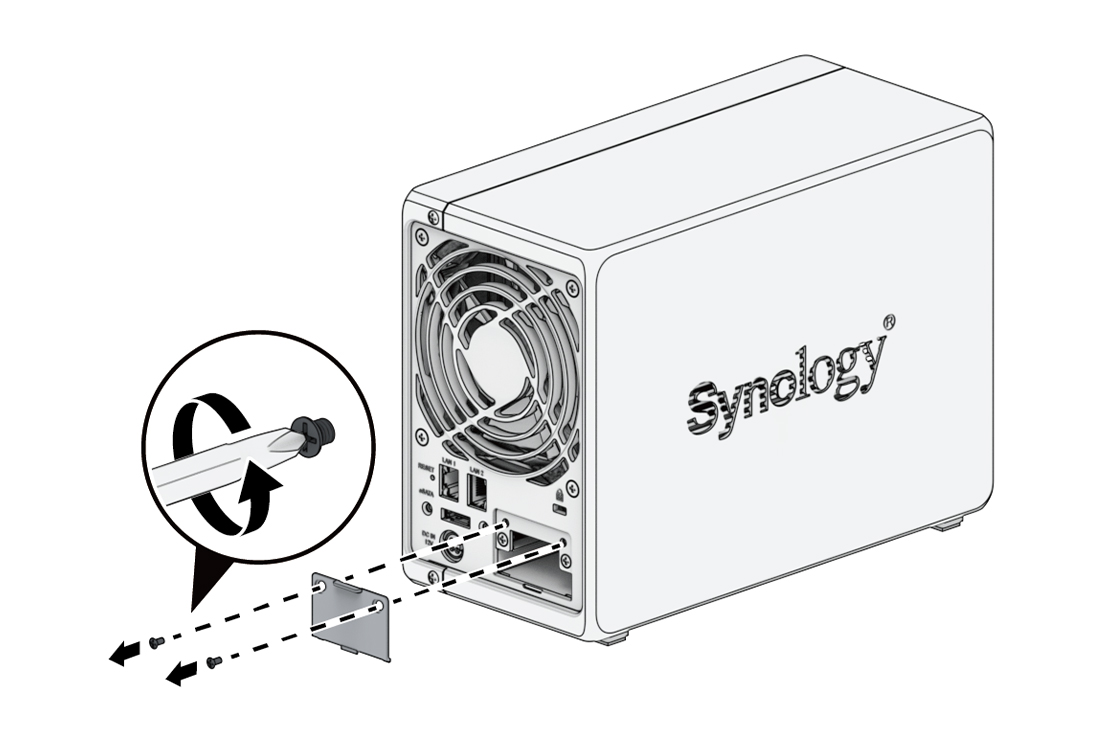
2.3 Install Network Upgrade Module
Your Synology NAS has a Network Upgrade slot which allows you to install network upgrade module for LAN port expansion.
To install a network upgrade module
1. Shut down your Synology NAS. Disconnect all cables from your Synology NAS to prevent possible damage.
2. Remove the two screws on the PCIe expansion shield to remove the shield.
3. Insert the network upgrade module and tighten the two screws to secure the newly inserted module.
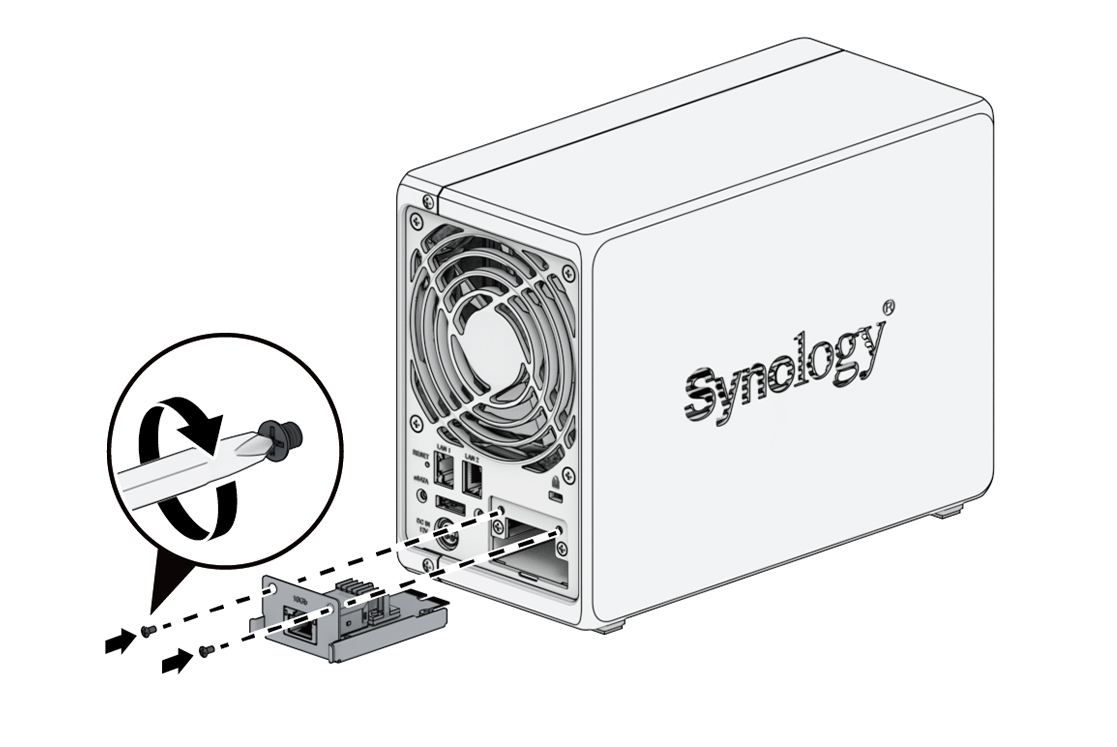
Notes : Confirm that the network upgrade module is fully inserted. Otherwise, the network upgrade module might not be able to function properly.

2.4 Add a Memory Module to Synology NAS
Optional Synology memory modules are designed to expand the memory of your Synology NAS. Follow the steps below to install, check, or remove a memory module on your Synology NAS.
The following table shows the memory configuration for best practice:
|
Slot 1
|
Slot 2
|
Total Memory
|
|
2 GB
|
-
|
2 GB
|
|
4 GB
|
4 GB
|
8 GB
|
|
8 GB
|
8 GB
|
16 GB
|
|
16 GB
|
16 GB
|
32 GB
|
To remove the memory module
1. Shut down your Synology NAS. Disconnect all cables from your Synology NAS to prevent possible damage.
2. Remove the hard drive trays from the drive bays. The memory slots are located on the inner right side of your Synology NAS.
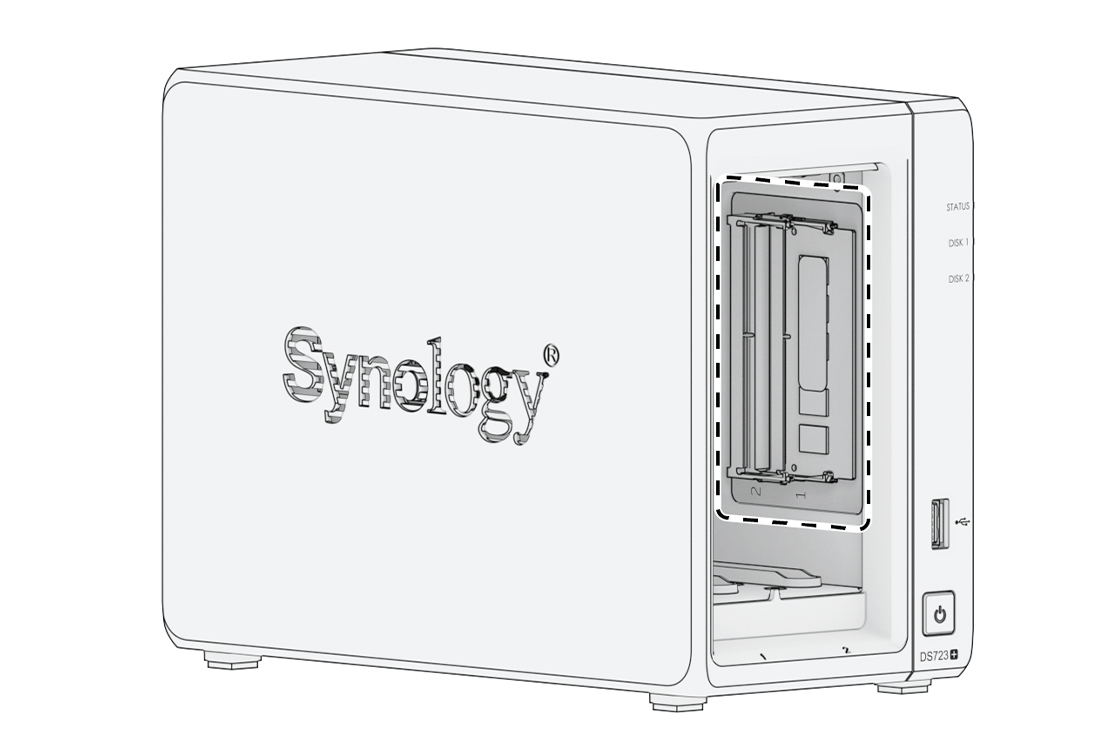
Notes : When you remove the drive trays, sensitive internal components are exposed. Avoid touching anything other than the memory assembly when removing or adding memory.
3. The memory slots are numbered as shown below.
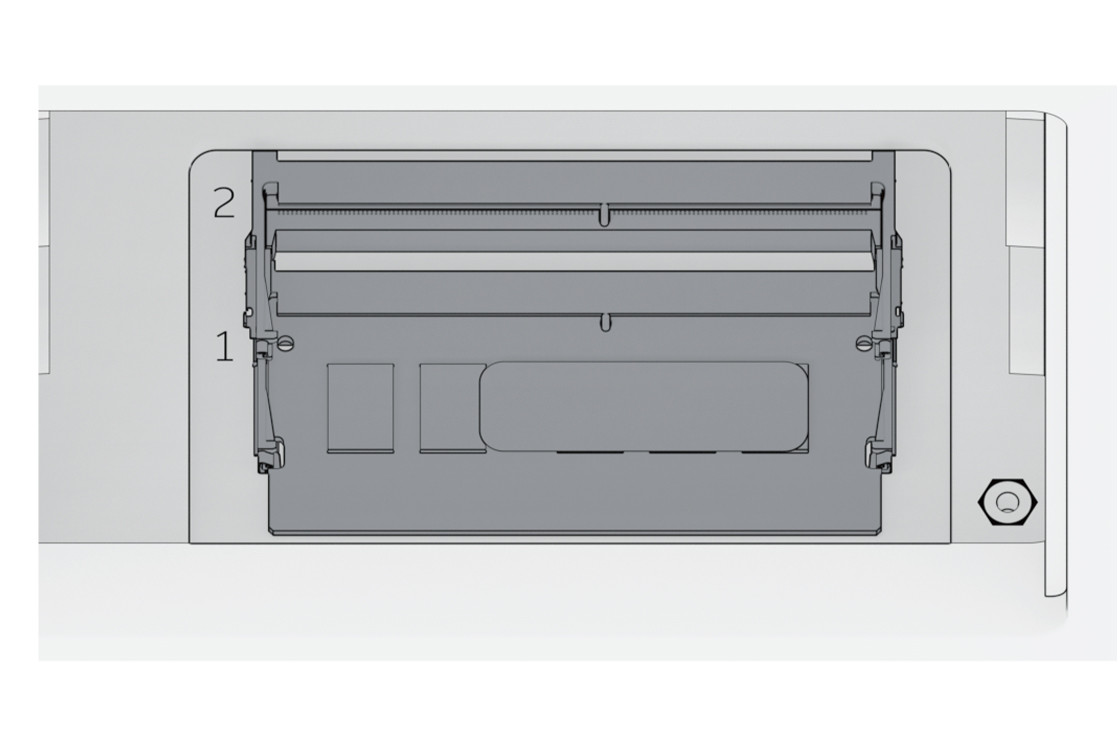
4. Push the levers on both sides of the memory module outward. The memory module will be released from its slot.
5. Hold the memory module by its edges and remove it from the slot.

6. Insert the drive trays back into the drive bays.
7. Reconnect the cables removed in step 1, then press the power button to turn on your Synology NAS.
To install the memory module
1. Follow step 1 and 2 of the "To remove the memory module" section to shut down your Synology NAS, disconnect the cables and remove the drive trays.
2. Insert the new memory module into the empty slot:
a. Align the small gap between the gold connectors of the memory module with the notch on the empty slot. Insert the memory module into the slot. Make sure that the module is properly inserted.
b. Gently push down the memory module until you hear a click.

Notes : Hold the memory module by its edges and avoid touching the gold connectors.
3. Insert the drive trays back into the drive bays.
4. Reconnect the cables removed in step 1, then press the power button to turn on your Synology NAS.
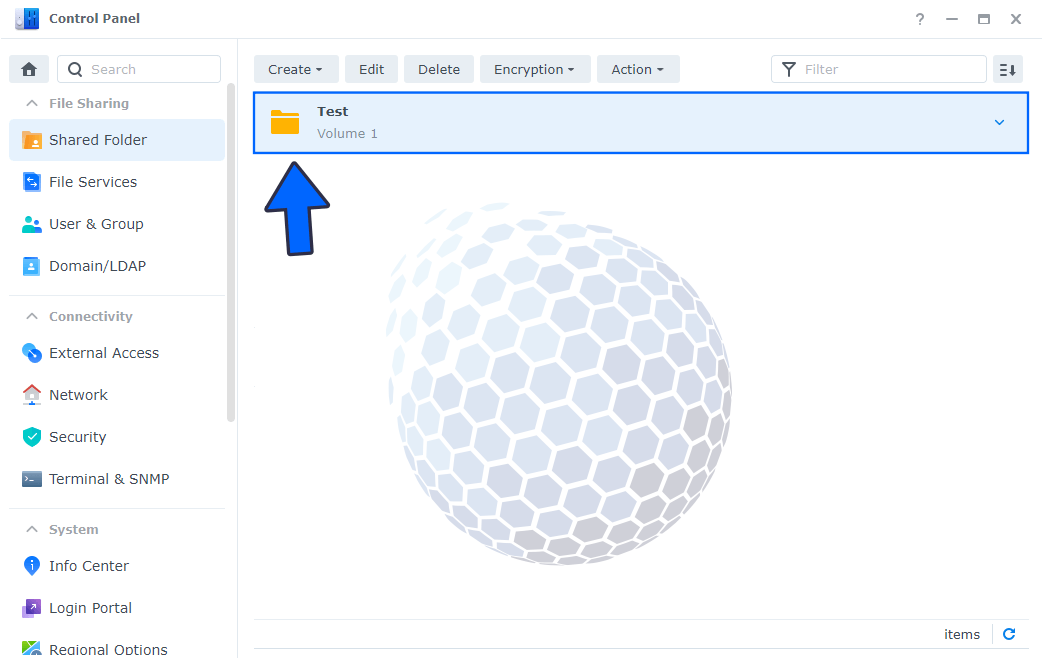
To make sure your Synology NAS recognizes the new memory capacity
1. Install DiskStation Manager (DSM). Please see "Install DSM on Synology NAS" for more information.
2. Sign into to DSM as admin or a user belonging to the administrators group.
3. Go to Control Panel > Info Center and check Total Physical Memory.
If your Synology NAS does not recognize the memory or does not start up successfully, please make sure that the memory module is installed correctly.

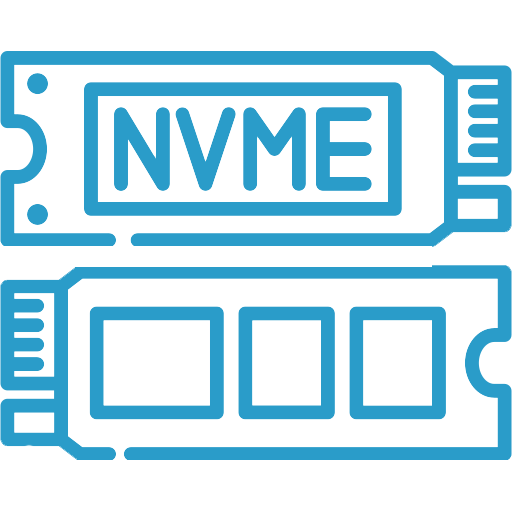
2.5 Add an M.2 NVMe SSD to Synology NAS
You can install up to two M.2 NVMe 2280 SSDs on your Synology NAS. Follow the steps below for SSD module installation and removal.
To install an M.2 NVMe SSD module
1. Shut down your Synology NAS. Disconnect all cables from your Synology NAS to prevent possible damage.
2. The SSD slots are located at the bottom of your Synology NAS.
3. Remove the two covers protecting the modules. You will see two empty slots that are numbered as shown below.

Notes : Hold the SSD module by its edge and avoid touching the gold connectors.
4. Start from the slot 1. Insert your SSD module into the empty slot :
a. Align the small gap between the gold connectors of the SSD module with the notch in the empty slot. Insert the module into the slot. Make sure that the module is properly inserted.
b. Push the lever outward as shown below. While holding the lever, push down the SSD module, then release the lever to secure the SSD module. Replace the covers.
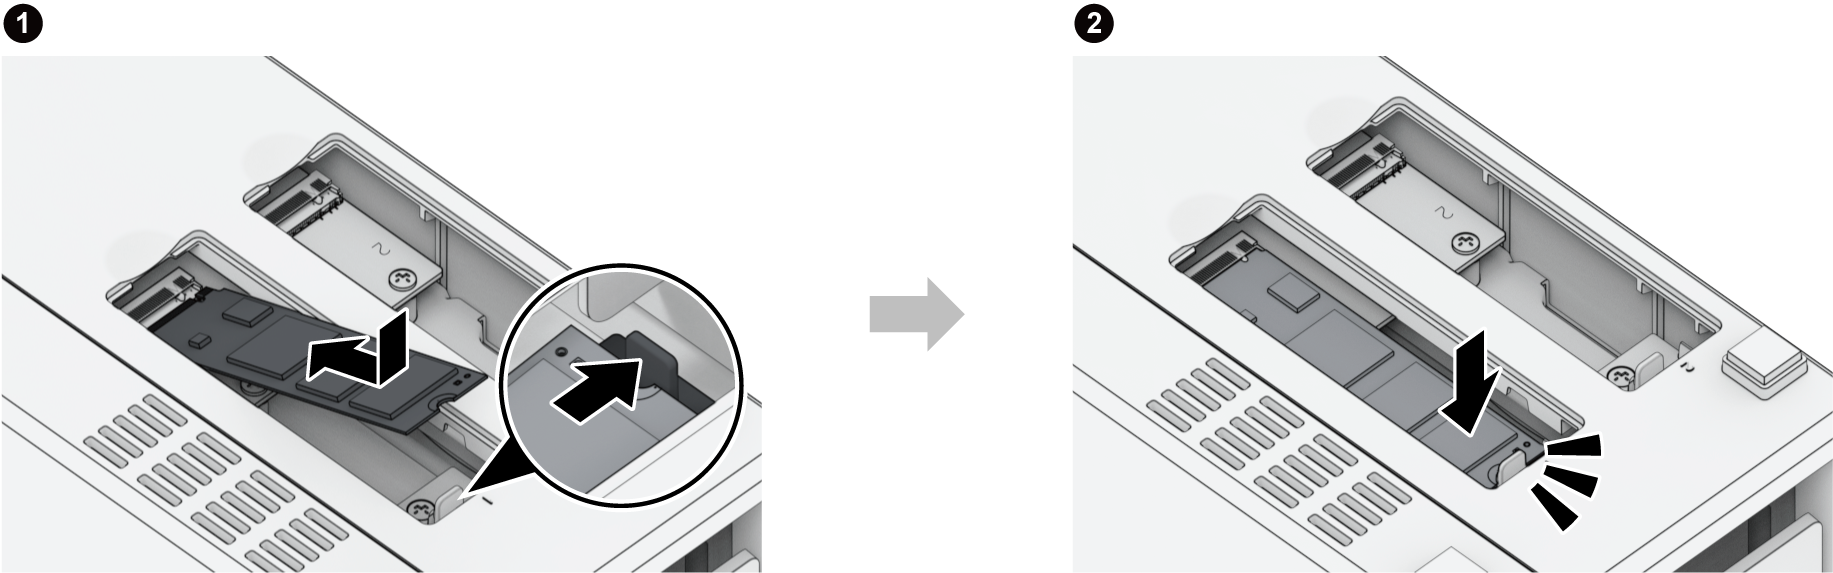
5. If needed, repeat the steps above to install a second SSD module into the second slot.
6. Reconnect the cables removed in step 1, then press the power button to turn on your Synology NAS.
To remove the M.2 NVMe SSD module
1. Shut down your Synology NAS. Disconnect all cables from your Synology NAS to prevent possible damage.
2. Push the lever outward. The module will pop up and be released from the slot.
3. Hold the SSD module and remove it from the slot. Replace the covers.
4. Reconnect the cables removed in step 1, then press the power button to turn on your Synology NAS.

2.6 Start up Your Synology NAS
1. Use the LAN cable to connect the Synology NAS to your switch, router, or hub.
2. Connect one end of the AC power adapter to the power port of your Synology NAS. Connect one end of the AC power cord to the AC power adapter, and the other to the power outlet.

3. Press the power button to turn on the Synology NAS.
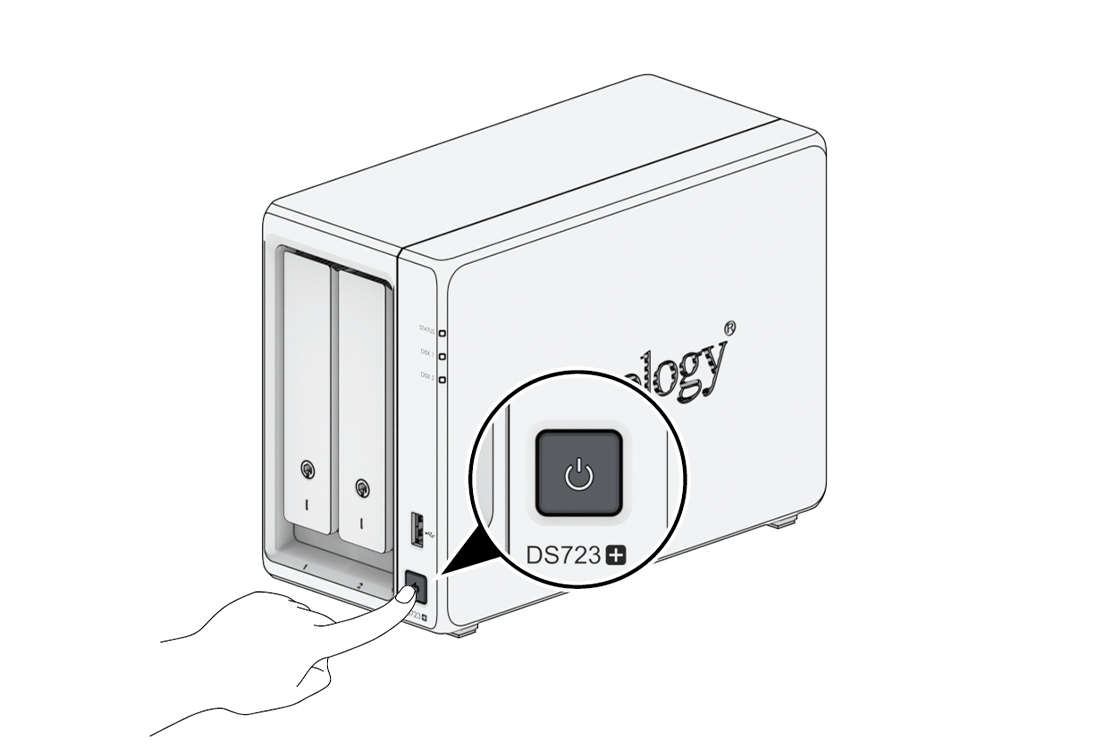
Congratulations! Your Synology NAS is now online and detectable from a network computer.